Celebrate with Red, White, and Blue Jello Cups!
As summer approaches, and you start planning barbecues, picnics, or any festive gathering, there’s a dish that always shines brightly at the table: jello cups. Not just any jello cups, but the cheerful and vibrant Red, White, and Blue Jello Cups! These delightful treats embody the spirit of celebration with their eye-catching colors and their playful, jelly-like texture. As I think back to the summer gatherings of my childhood, I remember those sunny afternoons, friends and family gathered around, laughter echoing, and, of course, the dessert that stole the show—jello cups.
Picture this: the snacks are laid out, burgers are sizzling on the grill, and the kids are running freely in the yard. Then, you spot them—those multi-colored jello cups, shimmering under the warm sun, just waiting to be devoured! As a kid, I would make a beeline for them, enchanted by the vibrant colors and the wobbly, jiggly fun they promised. And as I dug in, the sweetness of the jelly would dance on my taste buds, making me feel like it was the ultimate summer treat.
Now, as an adult, I’ve grown to appreciate not only the nostalgia but also the opportunity for creativity these jello cups present. They’re so easy to make and can easily be customized to fit any occasion—be it the Fourth of July, Memorial Day, or even just a sunny weekend. Trust me when I say, if you want to impress your friends with a treat that’s both festive and delicious, these Red, White, and Blue Jello Cups are a surefire hit!
Let’s join hands and dive into the kitchen, shall we? I’ll guide you through this fun, straightforward recipe, and we’ll coax the flavors from these simple ingredients to create an unforgettable dessert that brings smiles to the table!
A Sweet Childhood Memory
One of my fondest childhood memories revolves around a family picnic at the park every Fourth of July. The atmosphere was electrifying! My cousins and I would play tag, and the adults would set up a generous spread of various holiday-themed foods. But the highlight for me was always the dessert table. Amongst the pies and cookies sat those tempting, jiggling Jello Cups—red, white, and blue. I can still hear my aunts giggling as they tried not to let the kids grab more than one cup, but I always managed to sneak an extra!
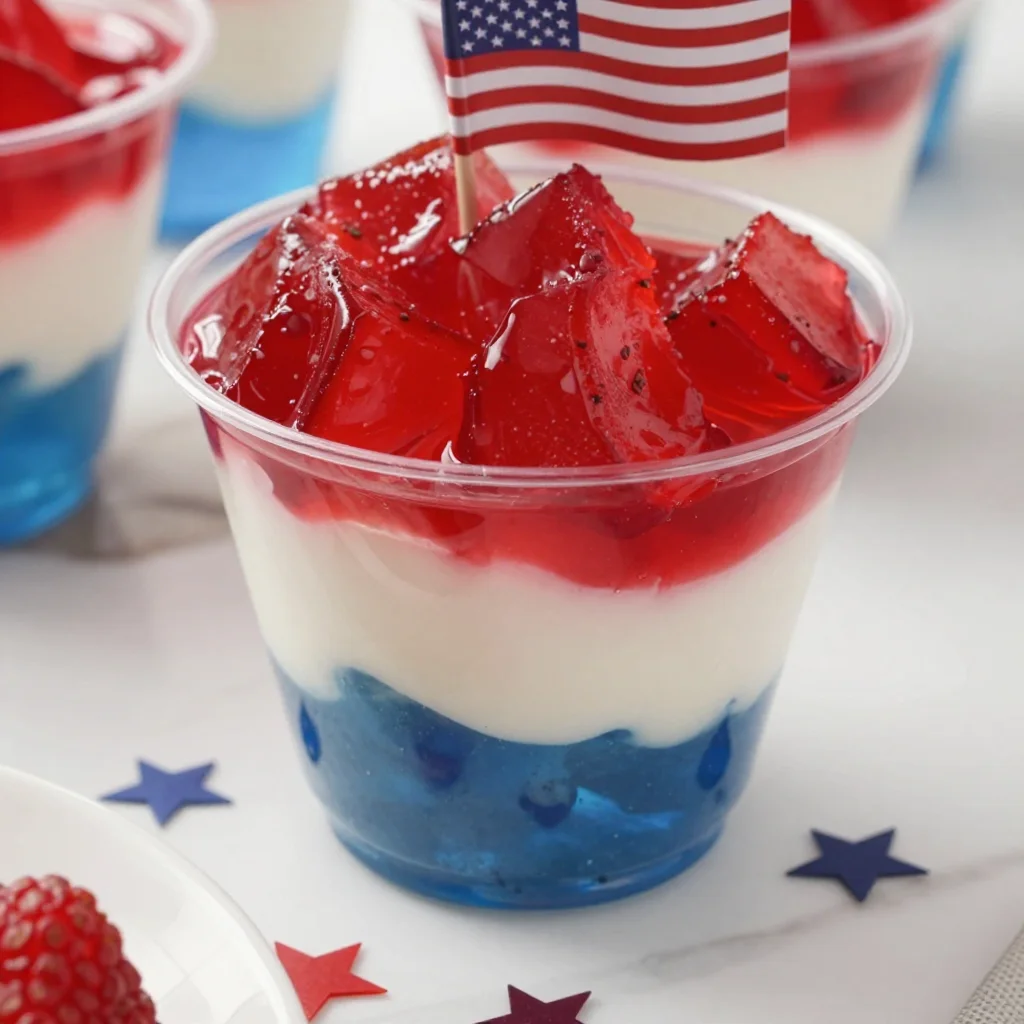
I remember the anticipation of digging the spoon into that fluffy whipped topping, savoring each layer—the sweet tang of the cherry jello, the creamy white center, and the tartness of blue raspberry jello that burst in my mouth. Even thinking about it transports me back to those sun-soaked days, surrounded by laughter and love. Now, I make these very jello cups (with a protein twist!) for my own gatherings, passing down that tradition while adding my little chef’s flair. Let’s create our magical treat together!
Ingredients You’ll Need
To whip up these delightful Red, White, and Blue Jello Cups, gather the following ingredients:
-
1 box of red Jello (strawberry or cherry flavor): This is the base layer. The vibrant red hue not only adds festivity but also delivers that sweet fruitiness we crave. Feel free to substitute any red fruit flavor you love!
-
1 box of blue Jello (blue raspberry flavor): Perfect for that striking blue layer, this flavor is a crowd favorite. You can switch it up with grape or any blue fruit flavor if that tickles your fancy!
-
1 box of unflavored gelatin: This ingredient is vital for giving our white layer a creamy texture. It ensures that our Cool Whip layers beautifully without being overly sweet.
-
1 cup of boiling water: This helps dissolve the jello and gelatin, ensuring a smooth consistency.
-
1 cup of cold water: Cold water helps set the jello more quickly and provides the right temperature jump needed for those layers to form perfectly.
-
1 cup of Cool Whip: This adds the ‘white’ layer—light, fluffy, and absolutely delicious. If you’re into making things from scratch, a homemade whipped cream can be used as a healthier alternative.
-
Optional: Fresh berries for garnish: Strawberries or blueberries make a lovely garnish on top of your jello cups, adding a fresh touch and extra flavor.
Step-by-Step Instructions
Now that we have our ingredients ready, let’s get cooking! Here’s how to create those colorful jello cups step-by-step!
-
Prepare the Red Layer: In a medium mixing bowl, combine the red Jello powder with 1 cup of boiling water. Stir vigorously until the jello is completely dissolved. Tips: Using a whisk can speed up this process – plus, it’s kinda fun to watch the jello dissolve!
-
Add Cold Water: Once dissolved, mix in 1 cup of cold water to cool the mixture down. Give it a little taste if you want (I always do!), just to check that sweet tanginess!
-
Layer One: Carefully pour the red jello mixture into clear cups or small bowls, filling them about a third of the way up. Pop these in the refrigerator for about 30 minutes, or until they are firm.
-
Prepare the White Layer: While the red layer sets, let’s work on the white one! In another bowl, sprinkle the unflavored gelatin over 1/2 cup of water. Let it sit for a couple of minutes. This stage is called “blooming” the gelatin (fancy, huh?).
-
Dissolve Gelatin: Once bloomed, add 1/2 cup of boiling water to dissolve the gelatin. Mix until there are no lumps. Then fold in the Cool Whip gently, creating a beautiful, fluffy layer. Make sure to fold instead of stirring to keep that delightful airy texture!
-
Layer Two: Once the red layer is set, evenly distribute the white mixture on top of the red layer in each cup. You want to fill them nearly to the top again. Give it a gentle shake to even it out, then back to the fridge it goes for another 30 minutes.
-
Prepare the Blue Layer: While that chills, repeat the steps you took with the red jello for the blue layer! Mix together the blue jello and boiling water, then add cold water until dissolved.
-
Layer Three: Once the white layer is set, pour the blue jello mixture over the white layer in each cup, filling to the top.
-
Chill: Now the hardest part—let these beauties chill for at least 2-3 hours. Trust me; it’s worth the wait!
-
Garnish and Serve: Before serving, finish it off with fresh berries on top. Kids and adults alike will love it!
Serving Suggestions
When it comes to serving these Red, White, and Blue Jello Cups, presentation is key! Serve them in clear glass cups or mason jars to showcase their layers. You could even top each cup with a small dollop of extra Cool Whip and a sprinkle of fresh berries for that wow factor. Plus, they make a fantastic centerpiece for any picnic table or dessert spread. The colorful layers are not only visually appealing but also signal how delicious each bite will be! Enjoy them cold and fresh on a warm summer day.
Recipe Variations
Want to switch things up? Here are a few fun twists and variations you can try:
-
Fruit-Infused Layers: Add pureed strawberries or blueberries to the white layer for a fruity twist. Just remember to adjust the sweetness if needed!
-
Gummy Candy: For a fun, kid-friendly twist, stir in some gummy candies (like star-shaped gummies) right before serving or as a topping.
-
Different Colors: Get creative with other flavors and colors! Orange and green can be festive for Halloween, while pastels work wonderfully for Easter.
-
Add Protein: Mix in a scoop of protein powder into your Cool Whip layer for a healthy twist—who says dessert can’t be nutritious?
-
Vegan Version: Swap the jello for plant-based alternatives, and use coconut whipped cream instead of Cool Whip for a vegan-friendly treat.
Chef’s Notes
As a passionate home chef, my love for experimenting in the kitchen often means I end up with some funny stories and a lesson or two learned. I vividly remember the time I tried to hurry the setting process by placing the cups in the freezer. Let’s just say I ended up with jello cups that were firmer than I anticipated—hello, jello bricks! All in good fun, it reminded me that patience is key, especially with delightful desserts like these.
Over time, this recipe has evolved. I’ve played around with flavors, trying to incorporate seasonal fruits and even adapting it for dietary needs. The beauty of these cups is not just their vibrant appearance but also how adaptable they can be, making them suitable for everyone at your gathering.
FAQs and Troubleshooting
1. Why isn’t my jello setting properly?
If your jello isn’t setting, double-check that you’ve used the correct proportions of boiling and cold water. The gelatin needs to bloom and dissolve completely for it to set properly.
2. Can I make these jello cups ahead of time?
Absolutely! These cups can be made a day in advance; just ensure they stay covered in the fridge until serving time to maintain their freshness.
3. How can I make sure the layers stay separate?
Allow each layer to fully set in the fridge for the recommended time before adding the next layer. A little patience goes a long way in achieving those stunning distinct layers!
4. What if I want to make a bigger batch?
No problem! Just scale up the ingredients while keeping the same layering process. Larger cups or bowls make for a fun communal dessert at gatherings!
Nutritional Info
(Feel free to adjust this as needed based on your recipe variations and personal assessments!)
Per Jello Cup (approximate)
Calories: 120
Protein: 2g
Carbs: 28g
Fat: 1g
Sugar: 20g
There you have it! Your complete guide to creating eye-catching and delicious Red, White, and Blue Jello Cups that are sure to light up your gatherings. From the memories to the sweet satisfaction, I hope this recipe brings as much joy to your kitchen as it has to mine. So go ahead, gather your ingredients, and get ready to unleash your inner culinary artist. Happy cooking! 💙❤️
PrintRed, White, and Blue Jello Cups
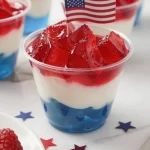
Vibrant and festive jello cups perfect for summer gatherings and celebrations.
- Prep Time: 15 minutes
- Cook Time: 0 minutes
- Total Time: 180 minutes
- Yield: 4 servings 1x
- Category: Dessert
- Method: Chilling
- Cuisine: American
- Diet: Vegetarian
Ingredients
- 1 box of red Jello (strawberry or cherry flavor)
- 1 box of blue Jello (blue raspberry flavor)
- 1 box of unflavored gelatin
- 1 cup of boiling water
- 1 cup of cold water
- 1 cup of Cool Whip
- Optional: Fresh berries for garnish
Instructions
- Prepare the Red Layer: In a medium mixing bowl, combine the red Jello powder with 1 cup of boiling water. Stir until completely dissolved.
- Add Cold Water: Mix in 1 cup of cold water to cool the mixture down.
- Layer One: Pour the red jello mixture into clear cups about a third of the way up and refrigerate for 30 minutes.
- Prepare the White Layer: In another bowl, sprinkle the unflavored gelatin over 1/2 cup of water and let it sit for a couple of minutes.
- Dissolve Gelatin: Add 1/2 cup of boiling water to dissolve the gelatin, then fold in the Cool Whip gently.
- Layer Two: Once the red layer is set, pour the white mixture on top and refrigerate for another 30 minutes.
- Prepare the Blue Layer: Repeat the steps for the blue Jello mixture, then pour it on top of the white layer.
- Chill: Let the jello cups chill for at least 2-3 hours until fully set.
- Garnish and Serve: Top with fresh berries before serving.
Notes
Serve them in clear glass cups to showcase their layers! You can also add a dollop of extra Cool Whip on top for presentation.
Nutrition
- Serving Size: 1 cup
- Calories: 120
- Sugar: 20g
- Sodium: 50mg
- Fat: 1g
- Saturated Fat: 1g
- Unsaturated Fat: 0g
- Trans Fat: 0g
- Carbohydrates: 28g
- Fiber: 0g
- Protein: 2g
- Cholesterol: 5mg
Keywords: jello cups, summer dessert, festive dessert, Fourth of July, picnic treats