

Discovering Watermelon Mochi: A Sweet and Chewy Delight
Hey there, foodie friends! 🌟 Sophie here, and today I’m super excited to share one of my ultimate obsessions: Watermelon Mochi. Now, if you’ve ever had mochi, you know it’s that irresistibly chewy Japanese treat that has a way of stealing your heart—or perhaps your whole snack stash! And when you add the sweet burst of watermelon, it takes this little gem to a whole new level of deliciousness.
You know how summer days feel, lazy and endless, with the sun kissing your skin? That’s the essence I wanted to capture in this mochi. Light, refreshing, and oh-so-sweet—watermelon mochi is like taking a bite out of summer itself. You’re going to love how easy it is to whip up this delightful treat, and trust me, your taste buds will be thanking you!
A Sweet Summer Memory: The First Bite
Growing up, I have fond memories of summer visits to the local farmer’s market with my family. We’d stroll between the stalls, the air thick with the scent of ripe fruits, and I vividly remember the juicy, sun-ripened watermelons that always beckoned me closer. It wasn’t just the colors and shapes that captivated my attention, but the way watermelon became a centerpiece during hot summer picnics and backyard BBQs. It was the fruit that could instantly bring everyone together!
The first time I had mochi was during a family trip to a quaint little Japanese restaurant. The cheery owners made it in-house, and as I took my first bite, I was enchanted by the unique texture and sweetness. Fast forward a few years, and I decided to create something that froze that moment in time: Watermelon Mochi! Combining my love for this classic with the flavors of summer is like reliving those sweet memories all over again. Now, let’s dive in and make this delightful treat ourselves, shall we? 💕
Ingredients
Here’s what you’ll need to whip up your own Watermelon Mochi:
- 2 cups sweet rice flour (mochi flour): This special flour gives mochi its signature chewiness and elasticity. Don’t confuse it with regular rice flour; sweet rice flour has a higher starch content that’s essential for that perfect texture!
- 1 cup watermelon juice: Pure, sweet watermelon juice adds not just flavor but also a natural sweetness that will make this mochi stand out. You can juice fresh watermelon at home or use store-bought options—just make sure it’s 100% juice!
- 1/2 cup sugar: This adds an extra touch of sweetness to complement the watermelon. Adjust to your taste; if the watermelon is particularly sweet, you may find you need less!
- Cornstarch (for dusting): This ingredient is a must for preventing things from sticking. Trust me; cornstarch will be your best friend in this recipe!
- Optional: Food coloring: If you want to enhance that vibrant watermelon pink or add some fun colors, a drop or two of food coloring will do the trick.
Chef’s Insights
If you’re on a health kick, feel free to reduce the sugar or substitute it with a sugar alternative like stevia or agave syrup. Also, if you can’t find sweet rice flour, you can try using glutinous rice flour, but make sure to research the texture differences beforehand!
Step-by-Step Instructions
So you’re all set with your ingredients? Awesome! Now, let’s make some mochi magic happen.
-
Prepare Your Watermelon Juice: Start by cutting up a fresh, juicy watermelon. Use a blender to puree it, then strain through a fine sieve or cheesecloth to get that smooth juice. You’ll need about a cup of liquid gold! This step is essential because the smoother the juice, the smoother your mochi will be.
-
Mix the Dry Ingredients: In a large mixing bowl, combine the sweet rice flour and sugar. Give it a good whisk to ensure everything is evenly distributed. This little mix will be the foundation for your mochi.
-
Combine Wet and Dry: Gradually pour the watermelon juice into the dry mix, stirring continuously with a spatula. You want to achieve a thick, batter-like consistency. It should be smooth and somewhat sticky—this means you’re on the right track!
-
Steam the Mixture: You can either use a steamer basket or a heatproof dish lined with parchment paper in a pot of boiling water. Pour your mochi batter into the dish and cover it with a lid. Steam for about 20-25 minutes. This will cook the flour, and believe me, the aroma during this process is simply heavenly!
-
Cool Down: Once steamed, carefully remove the mochi from the steamer (be cautious of the steam!). Let it cool for 10 minutes. This part is crucial; if the mochi is too hot when you handle it, it can be a sticky mess!
-
Dust and Shape: Dust your work surface with cornstarch. Once cool enough to handle, transfer the mochi to this surface. Dust your hands with more cornstarch to prevent sticking. Using a knife or spatula, cut the mochi into bite-sized pieces. Roll each piece into a ball and dust with more cornstarch. Think of it as giving your mochi a little armor!
-
Chill and Enjoy: Place the finished mochi on a plate and pop it in the fridge for at least an hour before serving. It helps to firm it up, giving you that delightful chewiness. You can also freeze them for a super refreshing treat later on!
Pro Tip
Experiment with the thickness of your pieces. The thinner they are, the easier they may be to fill if you want to sneak in a little ice cream or fruit inside them!
Serving Suggestions
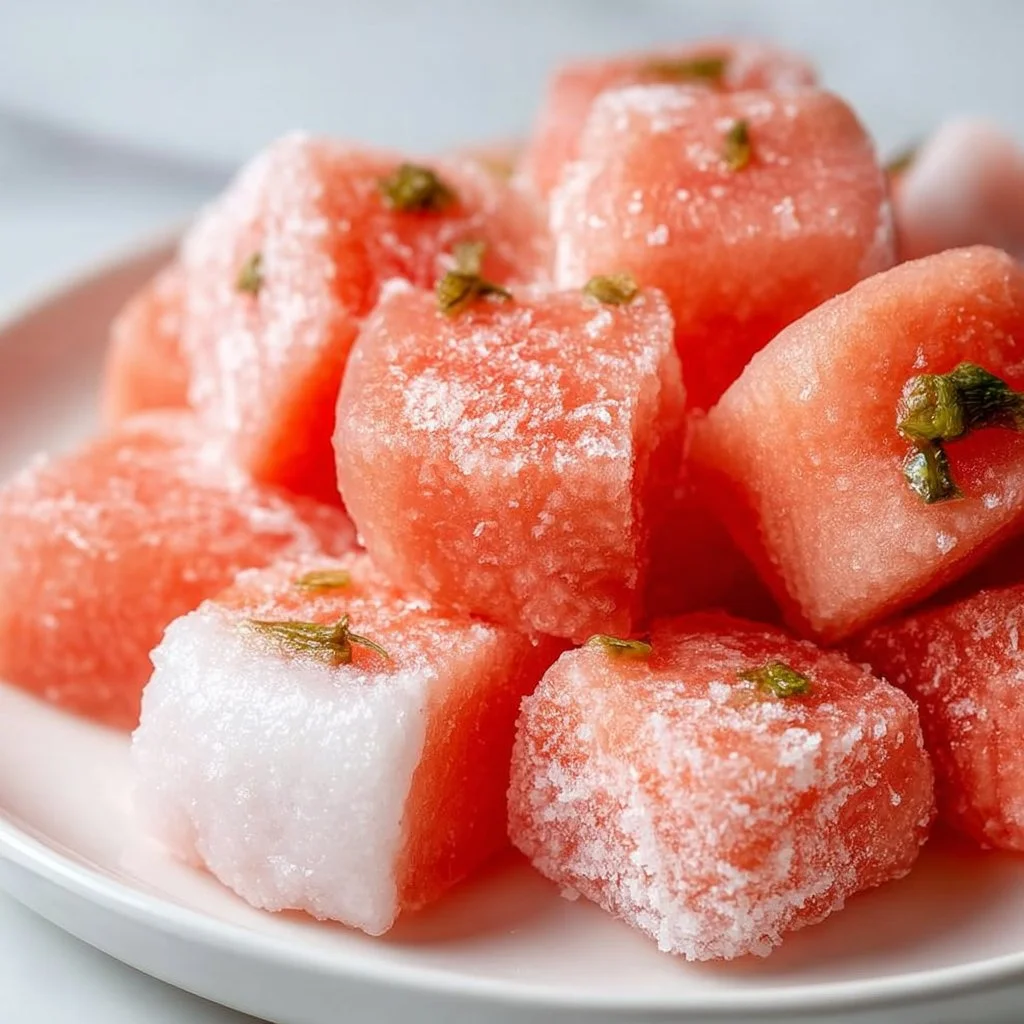
Once your Watermelon Mochi is fully chilled, the fun begins! These little bites of joy are best served cool, either as a refreshing snack on a hot day or as a light dessert at the end of a meal. Arrange them on a colorful plate or in a cute dessert bowl, sprinkle with a touch of extra cornstarch, and maybe garnish with fresh mint leaves for a touch of elegance!
Recipe Variations
Feeling creative? Here are some fabulous twists you can try with your Watermelon Mochi:
- Mixed Fruit Mochi: Substitute watermelon juice with a mix of your favorite fruit juices (kiwi, mango, and strawberry are delicious combos!).
- Matcha Mochi: Add a tablespoon of matcha powder to the flour mixture for a beautiful and earthy flavor contrast.
- Chocolate-Dipped Mochi: After chilling, dip the mochi in melted dark chocolate for an indulgent treat. You can never go wrong with that chocolatey goodness!
- Coconut Water Base: Swap the watermelon juice for coconut water for a tropical twist!
- Mini Mochi Bites: Shape smaller, bite-sized portions for a fun party snack that’s perfect for sharing!
Chef’s Notes
This recipe has become my pride and joy in the kitchen! Each time I make it, I cannot help but reminisce about those sunny days at the farmer’s market. I’ve tweaked this recipe over time, playing with flavors and ingredients, but the watermelon’s freshness always steals the show! Sometimes, when I want to feel extra fancy, I serve these little beauties during dinner parties. They never fail to impress!
Oh, and here’s a small fun story: the first time I made these for friends, I forgot my cornstarch dusting and ended up with a mochi blob instead of cute pieces. But hey, they still tasted amazing! It’s a reminder that even when things don’t go as planned, deliciousness prevails!
FAQs and Troubleshooting
1. My mochi turned out too sticky! What went wrong?
It may be that not enough cornstarch was used during the shaping process. Dusting your hands and the work surface generously with cornstarch will help prevent stickiness.
2. Can I store leftovers?
Absolutely! Store any uneaten mochi in an airtight container in the fridge for up to one week. For longer storage, freeze them! Just ensure they’re spaced out so they don’t stick together.
3. How do I know if the mochi is cooked through?
After steaming, the mochi should be slightly translucent and have a sticky texture. If it’s too mushy or too dry, you may need to adjust your cooking time next time.
4. Is it possible to make this without sugar?
Yes! Feel free to use a sugar substitute or natural sweeteners to suit your dietary preferences. Just keep in mind that sweetness levels may vary!
Nutritional Info
While exact nutritional information can vary based on specific brands and measurements, here’s a rough estimate per piece (assuming 12 pieces):
- Calories: Approximately 70
- Protein: 1g
- Carbohydrates: 15g
- Sugar: 5g
- Fat: 0g
Now you’re equipped to embrace the joy of making Watermelon Mochi yourself! So roll up those sleeves, and let’s make this refreshing treat together. Remember, cooking is all about having fun in the kitchen, so don’t stress! Enjoy the process and savor every delightful bite. Happy cooking! 🥰
PrintWatermelon Mochi

A refreshing and chewy Japanese treat infused with the sweet burst of watermelon, perfect for summer.
- Prep Time: 15 minutes
- Cook Time: 25 minutes
- Total Time: 40 minutes
- Yield: 12 pieces 1x
- Category: Dessert
- Method: Steaming
- Cuisine: Japanese
- Diet: Vegetarian
Ingredients
- 2 cups sweet rice flour (mochi flour)
- 1 cup watermelon juice
- 1/2 cup sugar
- Cornstarch (for dusting)
- Optional: Food coloring
Instructions
- Prepare your watermelon juice: Start by cutting up a fresh, juicy watermelon. Use a blender to puree it, then strain to get smooth juice.
- Mix the dry ingredients: In a bowl, combine sweet rice flour and sugar. Whisk well.
- Combine wet and dry: Gradually pour watermelon juice into the dry mix, stirring continuously until you achieve a thick, batter-like consistency.
- Steam the mixture: Pour the batter into a steamer basket or lined dish and steam for about 20-25 minutes.
- Cool down: Carefully remove the mochi and let it cool for 10 minutes.
- Dust and shape: Transfer the mochi to a cornstarch-dusted surface, cut into pieces, roll into balls, and dust with cornstarch.
- Chill and enjoy: Place the finished mochi in the fridge for at least an hour before serving.
Notes
Store leftovers in an airtight container for up to one week.
Nutrition
- Serving Size: 1 piece
- Calories: 70
- Sugar: 5g
- Sodium: 0mg
- Fat: 0g
- Saturated Fat: 0g
- Unsaturated Fat: 0g
- Trans Fat: 0g
- Carbohydrates: 15g
- Fiber: 0g
- Protein: 1g
- Cholesterol: 0mg
Keywords: watermelon mochi, dessert, Japanese treat, summer snack, chewy dessert