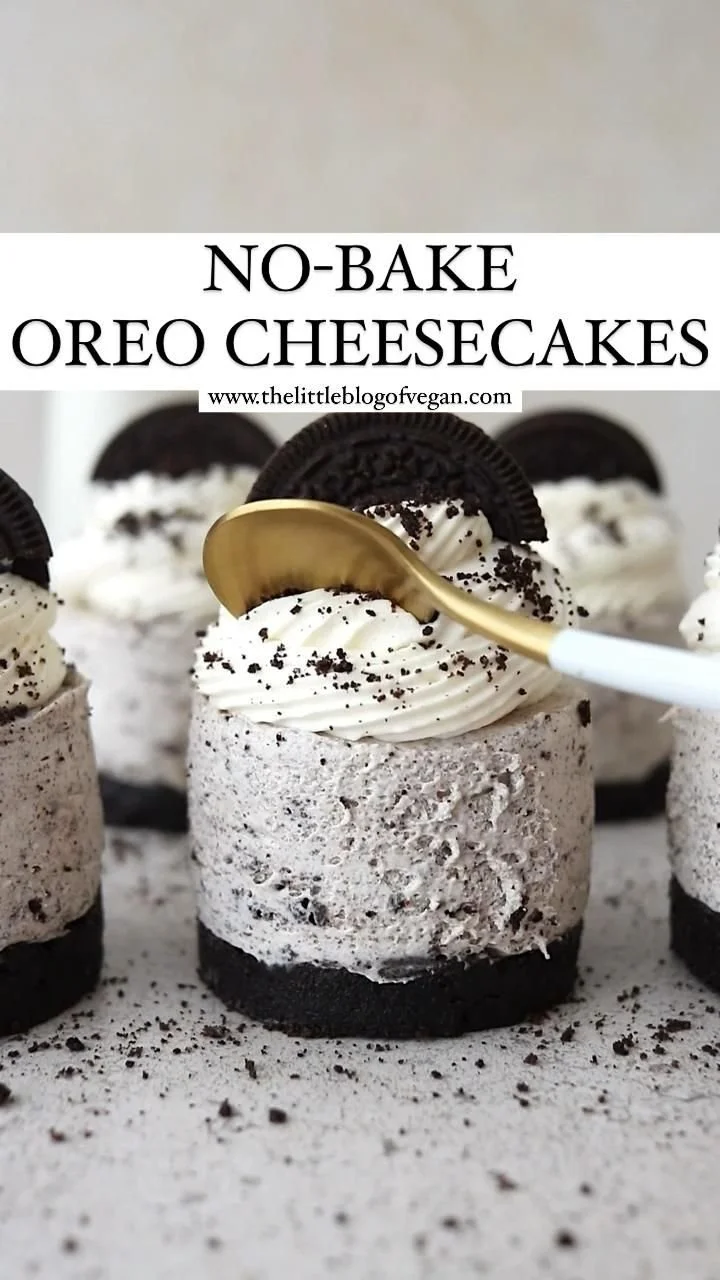
No-Bake Oreo Cheesecakes: A Sweet Delight Without the Bake
Hey there, fellow foodies! Today, I’m excited to share a super easy and delicious recipe for No-Bake Oreo Cheesecakes. Whether it’s for a celebratory occasion or just a treat to enjoy at home, this dessert is sure to make your taste buds dance with joy! Why no-bake, you ask? Because we all want to indulge in dessert without the hassle of turning on the oven, am I right?
A Circle of Memories
Let me take you on a little stroll down memory lane. One of my earliest kitchen escapades was making a dessert that my family fondly dubbed “Cookie Heaven.” It was always a highlight of our family gatherings. I remember standing on a stool to reach the countertop, the kitchen filled with the rich aroma of crushed Oreos that would make any sweet tooth’s heart skip a beat.
Fast-forward to today, and I’ve created many variations of that childhood favorite. The excitement on my family’s faces as I served my no-bake Oreo cheesecakes reminded me of why I fell in love with cooking in the first place. There’s something truly special about the little moments shared over food. With each creamy, dreamy bite, we were transported back to those joyous celebrations of years gone by. Now, let’s channel that nostalgic energy into making your very own no-bake Oreo cheesecakes!

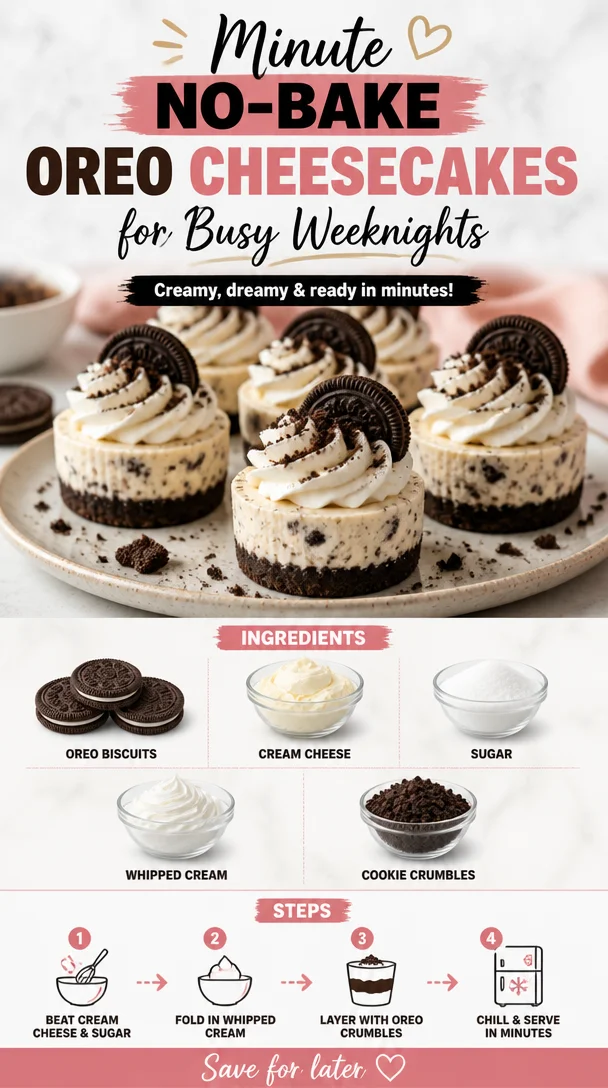
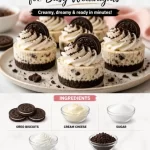
Ingredients
Here’s what you’ll need to whip up these delightful cheesecakes!
-
Oreo Biscuits: The star of the show! These chocolatey cookies will serve as the crust and bring that delicious cookie flavor.
- Substitution Tip: If you’re feeling adventurous, swap in a different flavor of sandwich cookie for a unique twist!
-
Cream Cheese: This creamy goodness adds that rich, decadent texture to your cheesecake.
- Quick Chef Insight: For a lighter option, consider using reduced-fat cream cheese, or swap half with Greek yogurt for added protein!
-
Sugar: Just a bit of sweetness to balance the cream cheese.
- Sweet Tip: Feel free to adjust the sugar based on your sweetness preference; you could also use honey or agave for a natural alternative.
-
Whipped Cream: This luscious topping adds clouds of fluffiness to our cheesecake.
- Pro Tip: Can’t find whipped cream? Blend heavy cream until soft peaks form. You can also use a non-dairy alternative for a creamy finish!
-
Cookie Crumbles: These will add that sweet, crunchy element to the top of your cheesecake for an added crunchy texture.
- Chef’s Hack: Save a few whole Oreos for garnish to elevate the presentation!
Step-by-Step Instructions
Let’s dive into the delightful world of no-bake cheesecakes! Grab your mixing bowls, and let’s get creating!
-
Crush the Oreos: In a food processor, pulse the Oreo biscuits until you have fine crumbs. If you don’t have a food processor, you can place them in a ziplock bag and crush them with a rolling pin—perfect stress relief!
- Tip: Save a few crumbs for garnish later.
-
Prepare the Crust: Combine the Oreo crumbs with melted butter in a mixing bowl. Mix until it’s combined and resembles wet sand. This will be the base of your cheesecake!
- Extra Tip: If your mixture seems too dry, add a little more melted butter!
-
Form the Crust: Press the crumb mixture firmly into the bottom of your serving glasses or cheesecake molds. Use the back of a spoon or your hands to create an even layer.
- Pro Insight: The firmer you pack it, the better your crust will hold together!
-
Mix the Filling: In a large bowl, combine softened cream cheese and sugar. Use a hand mixer to beat until smooth and creamy. This step is crucial for a luxurious texture!
- Kitchen Hack: Make sure your cream cheese is at room temperature to avoid lumps.
-
Incorporate Whipped Cream: Gently fold in the whipped cream until fully blended. You want it light and airy, so be gentle to keep that fluffy texture!
- Chef’s Tip: Reserve a little whipped cream to dollop on top before serving!
-
Layer the Mixture: Spoon the cheesecake filling over your prepared crust in each glass or mold. Tap them gently on the countertop to remove any air bubbles for a smooth finish.
- Fun Tip: Use a piping bag for a fancy touch!
-
Chill and Firm: Cover your cheesecakes with plastic wrap and place them in the refrigerator for at least 4 hours, preferably overnight. This cooling time allows the flavors to meld and the filling to set perfectly.
- Patience Tip: Use this time to reorganize your kitchen like I do!
-
Garnish and Serve: Once set, remove from the refrigerator. Top with extra whipped cream and sprinkle some cookie crumbles on top. Add a whole Oreo for that extra flair!
- Final Touch: A sprinkling of chocolate drizzle can take your no-bake cheesecakes to a whole new level!
Serving Suggestions
These individual no-bake Oreo cheesecakes are perfect for serving at parties, picnics, or a cozy night in! I like to pair them with a fresh fruit garnish—maybe some strawberries or raspberries—for a pop of color and nutrition. Serve them chilled alongside a steaming cup of coffee or a cold glass of milk, and enjoy every delightful spoonful!
Recipe Variations
Feeling adventurous? Here are a few creative twists to make this recipe your own:
- Mint Chocolate Oreo Cheesecake: Mix crushed mint Oreos into the filling for a refreshing minty flavor.
- Peanut Butter Lovers: Add a swirl of peanut butter to the filling for a nutty kick.
- Layered Delight: Create layers of different flavored cookies (like vanilla or peanut butter) for a fun visual and taste experience.
- Fruit-Infused: Add a layer of blended berries or fruit preserves between the crust and filling for a fruity surprise.
- Dairy-Free Version: Use coconut cream instead of whipped cream and vegan cream cheese for a dairy-free dessert that everyone can enjoy!
Chef’s Notes
Oh, the mishaps I’ve had in the kitchen! I remember the time I tried to make a version of these cheesecakes but forgot to read the cream cheese label properly—grabbed the one sprinkled with herbs instead! Let’s just say it made for a hilarious family dessert. But hey, cooking is all about experimenting and a bit of laughter, right?
These no-bake Oreo cheesecakes have evolved from my childhood memories of crushed Oreos into a beloved recipe that brings people together. Every time I make them, I’m reminded of how food can create joy and connection.
FAQs and Troubleshooting
Q1: Can I use a different type of cookie for the crust?
Absolutely! Feel free to experiment with any sandwich cookies or even digestive biscuits. Just remember to modify the amount of butter if the cookies have different moisture levels.
Q2: My filling isn’t thickening properly; what did I do wrong?
Make sure your cream cheese is at room temperature before mixing. If your mixture is too runny, it may need more chilling time. Trust the fridge; it works wonders!
Q3: How long can I store these cheesecakes?
They can be kept for up to 3 days in the refrigerator. Just remember to cover them well to prevent any refrigerator odors from sneaking in!
Q4: Can I make this recipe ahead of time for a party?
Yes! These cheesecakes are perfect for prepping ahead. Just store them in the fridge and garnish before serving.
Nutritional Info
Total per serving (approx):
- Calories: 350
- Protein: 5g
- Carbs: 34g
- Fat: 22g
And there you have it! Your guide to crafting luscious No-Bake Oreo Cheesecakes that are bound to impress. Remember, it’s about enjoying the process as much as the tasty outcome. Gather your loved ones, whip up these cheesecakes, and create your own sweet memories in the kitchen. Happy cooking, and I can’t wait to see your delicious creations! 🍰💖
PrintNo-Bake Oreo Cheesecakes
A super easy and delicious no-bake recipe for Oreo cheesecakes that bring back childhood memories of sweetness and joy.
- Prep Time: 30 minutes
- Cook Time: 240 minutes
- Total Time: 270 minutes
- Yield: 4 servings 1x
- Category: Dessert
- Method: No-Bake
- Cuisine: American
- Diet: Vegetarian
Ingredients
- 20 Oreo biscuits
- 8 oz cream cheese (softened)
- 1/2 cup sugar
- 1 cup whipped cream
- 2 tbsp butter (melted)
- Extra crushed Oreos for garnish
Instructions
- Crush the Oreos: In a food processor, pulse the Oreo biscuits until you have fine crumbs.
- Prepare the crust: Combine the Oreo crumbs with melted butter in a mixing bowl. Mix until combined.
- Form the crust: Press the crumb mixture firmly into the bottom of your serving glasses or cheesecake molds.
- Mix the filling: In a large bowl, combine softened cream cheese and sugar. Beat until smooth.
- Incorporate whipped cream: Gently fold in the whipped cream until fully blended.
- Layer the mixture: Spoon the cheesecake filling over your prepared crust in each glass or mold.
- Chill and firm: Cover your cheesecakes and place them in the refrigerator for at least 4 hours.
- Garnish and serve: Top with extra whipped cream and cookie crumbles before serving.
Notes
Feel free to experiment with different flavors of sandwich cookies for the crust.
Nutrition
- Serving Size: 1 cheesecake
- Calories: 350
- Sugar: 20g
- Sodium: 200mg
- Fat: 22g
- Saturated Fat: 12g
- Unsaturated Fat: 6g
- Trans Fat: 0g
- Carbohydrates: 34g
- Fiber: 1g
- Protein: 5g
- Cholesterol: 30mg
Keywords: no-bake, cheesecake, Oreo, dessert, easy recipe